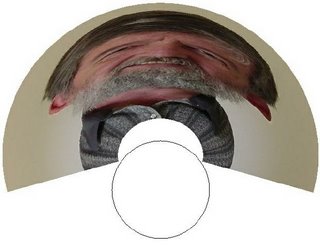
If you look at yourself (or some object or a drawing) in a curved mirror the image will be distorted. But how would you have to distort a drawing so that its image in a curved mirror looks normal? To undo a distortion, you would have to understand the nature of the distortion, which means you would first have to understand the way mirrors reflect light.
Flat mirrors
Flat mirrors reflect light according to a simple rule: light "bounces off" a mirror at equal angles. If light comes straight into a mirror it goes straight back out. If it comes in at a 45° angle, it reflects back at a 45° angle on the other side. It's the same rule as for a pool ball making a bank shot.
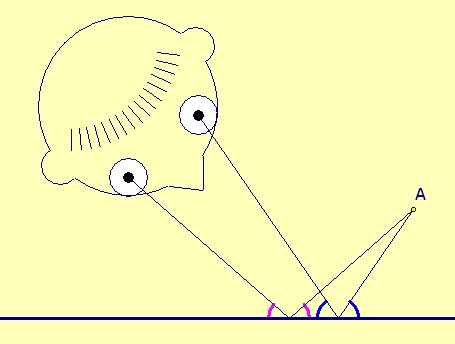
When you look in a mirror you literally look "into" an apparent room behind the mirror. (This is the basis for the story Through the Looking Glass that accompanies Alice in Wonderland.) The reason the image appears behind the mirror is made apparent by the second illustration.
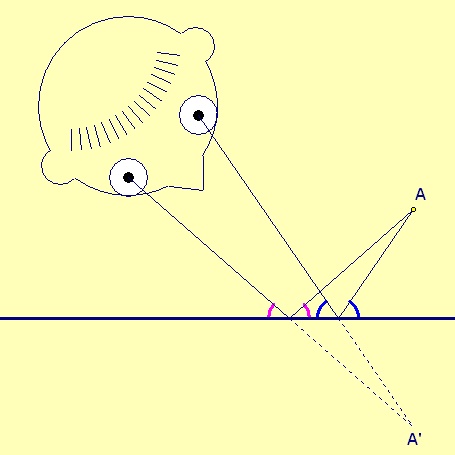
Your eyes locate where things are (or appear to be) by triangulating back to where the light is coming from (or appears to be coming from) based on the direction the light enters your eyes. Your brain assumes the light came in a straight line, so light from an object that has been reflected in a mirror appears to come from a point an equal distance directly behind the mirror.
So how does this help us with funhouse mirrors? Just as a small part of the curved earth looks flat, a small part of a curved mirror acts like a tiny flat mirror. A ray of light will reflect from a curved mirror just as it would from a flat mirror that is tangent to the curve at the point where the ray hits it.
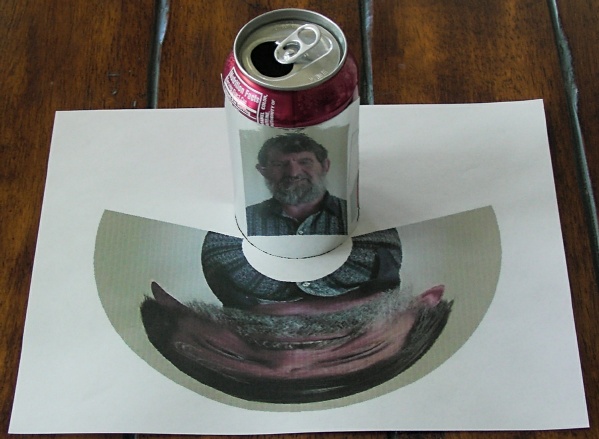
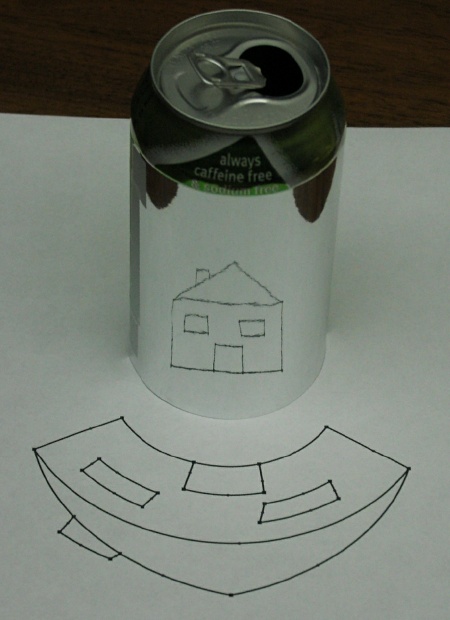
Our cylindrical mirror was made by wrapping a piece of "Chromolux" from Strathmore Decorative Sheet around a soda can.
The construction assumes you are looking at a picture behind a cylindrical mirror along parallel lines of sight. The goal is to transform the picture, point by point, to the region in front of the can. Imagine reversing the light rays and shining a laser at a point on the picture, holding the laser at a downward angle. The laser beam would reflect from the mirror and intersect the plane of the paper the same distance in front of the mirror as if it had continued behind the mirror to the original picture.
Step 1

Step 3
Step 4
Step 5
Step 6
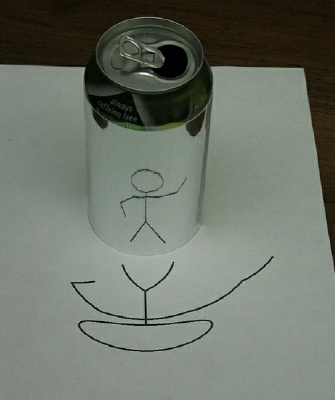
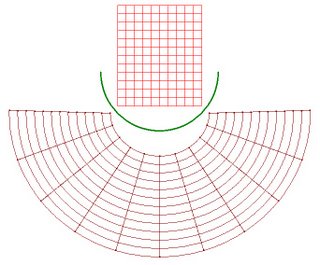
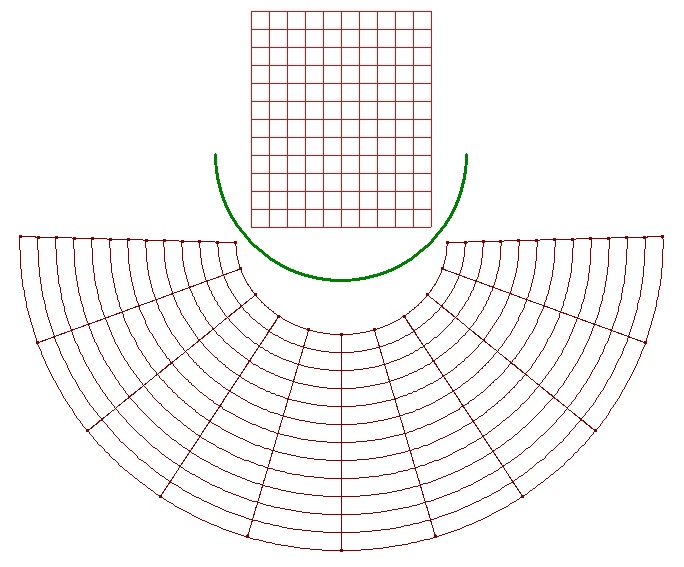
A good first activitiy is to construct a rectangular grid and its transformation. Anything a student can draw in the rectangular grid can be transformed to the distorted grid, square-by-square. Even young students can benefit from recognizing and working with the grid and its corresponding distorted form. (Download the pdf file for this grid. Be sure when you print it out to turn off any "shrink to fit page" settings to assure the printout is at 100% scale.)
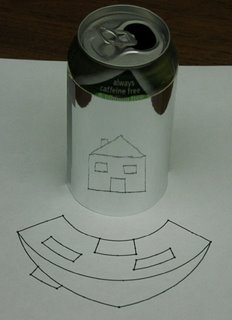
Whether or not the students work through the derivation, the distorted photos are highly motivating and can hold the interest of students at any level. The fact that they can be seen normally with a cylindrical reflector seems almost magic.
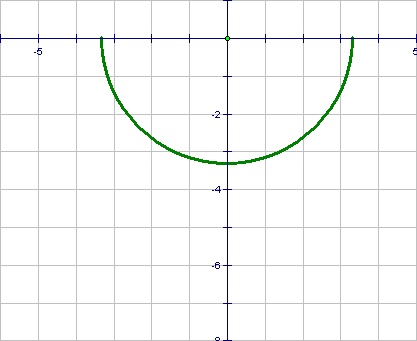
- Use Graph paper.
- Draw an arc (or a full circle) the size of your soda can representing the mirror.
(Radius = 3.32 cm for a typical soda can)
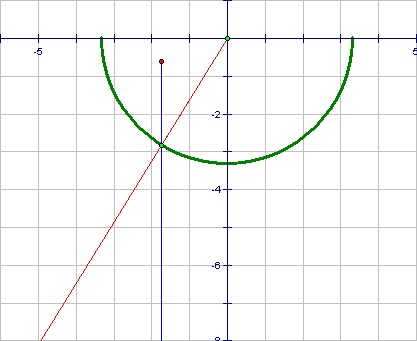
Step 2

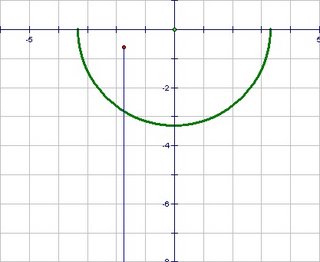
- Imagine this is a top view of the mirror and you are viewing it from a distance off the bottom of the page.
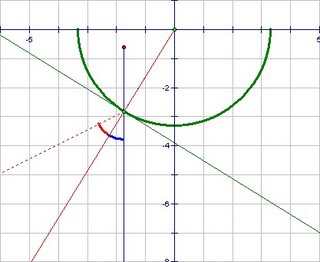
- Plot a point behind the mirror to be transformed to a point in front of the mirror.
- Draw the line-of-sight to the point behind the mirror.
Step 3
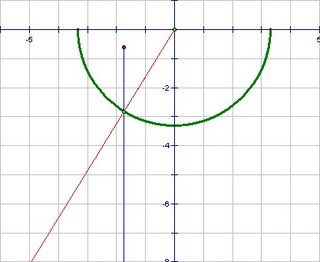
- Draw a ray from the center of the circle through the point where the line of sight hits the mirror. This ray is perpendicular to the mirror surface.
- A line or ray indicating the perpendicular at any point on a surface is said to be "normal" to the surface. ("Normal" in a mathematical context means perpendicular.)
Step 4

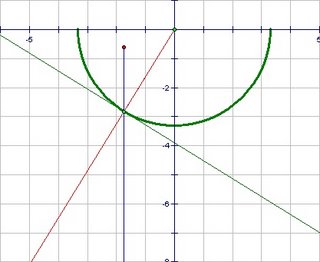
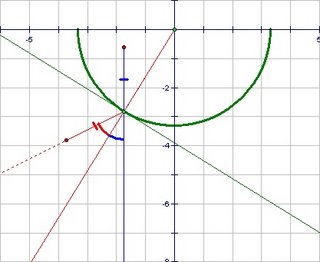
- You could (optionally) draw the tangent line perpendicular to this ray to represent an extension of the small section of mirror where the light is actually reflecting. This is an important step, conceptually, in understanding the principle of reflection from a curved surface, but it is not really needed to complete the construction.
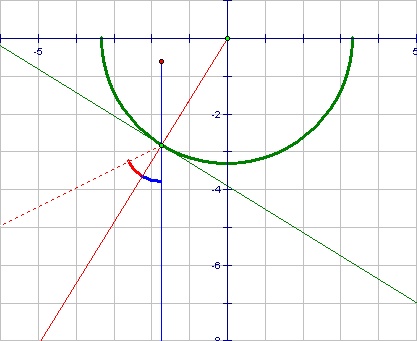
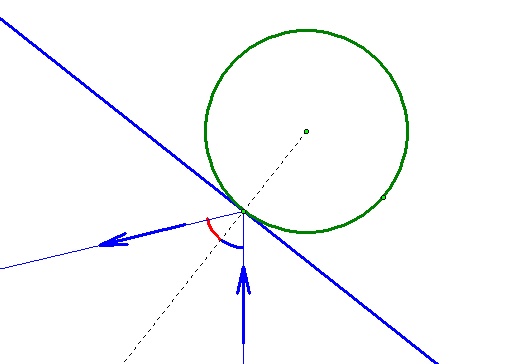
- Duplicate the angle between the line of sight and the normal ray as shown. If you shined a laser beam at the mirror this is the direction it would reflect.
- (Note that you could also have constructed equal angles with the tangent line. If the angles to the normal are equal, the angles to the tangent line are also equal.)

- Mark the distance along the reflected ray equal to the distance of the object behind the mirror. This is the location of the image point.
------------------------
A good first activitiy is to construct a rectangular grid and its transformation. Anything a student can draw in the rectangular grid can be transformed to the distorted grid, square-by-square. Even young students can benefit from recognizing and working with the grid and its corresponding distorted form. (Download the pdf file for this grid. Be sure when you print it out to turn off any "shrink to fit page" settings to assure the printout is at 100% scale.)
Older students can be taught to construct the transformation with compass and straightedge. Working through it is a good way to teach about the law of reflection as well as the geometry. The Geometer's Sketchpad can be used to implement the transformation and create transformations of line drawings. (Download GSP file here.)
To transform a photograph, one needs to be able to represent the construction in the form of a coordinate geometry algorithm that can be implemented in a computer program. The derivation requires a little vector algebra that would be accessible to Algebra II or Pre-Calculus students (i.e. they should be able to "follow" the derivation, but probably not derive it themselves.) Don't miss the opportunity to transform pictures of the students themselves! (Download the program used to do this here.)

Whether or not the students work through the derivation, the distorted photos are highly motivating and can hold the interest of students at any level. The fact that they can be seen normally with a cylindrical reflector seems almost magic.